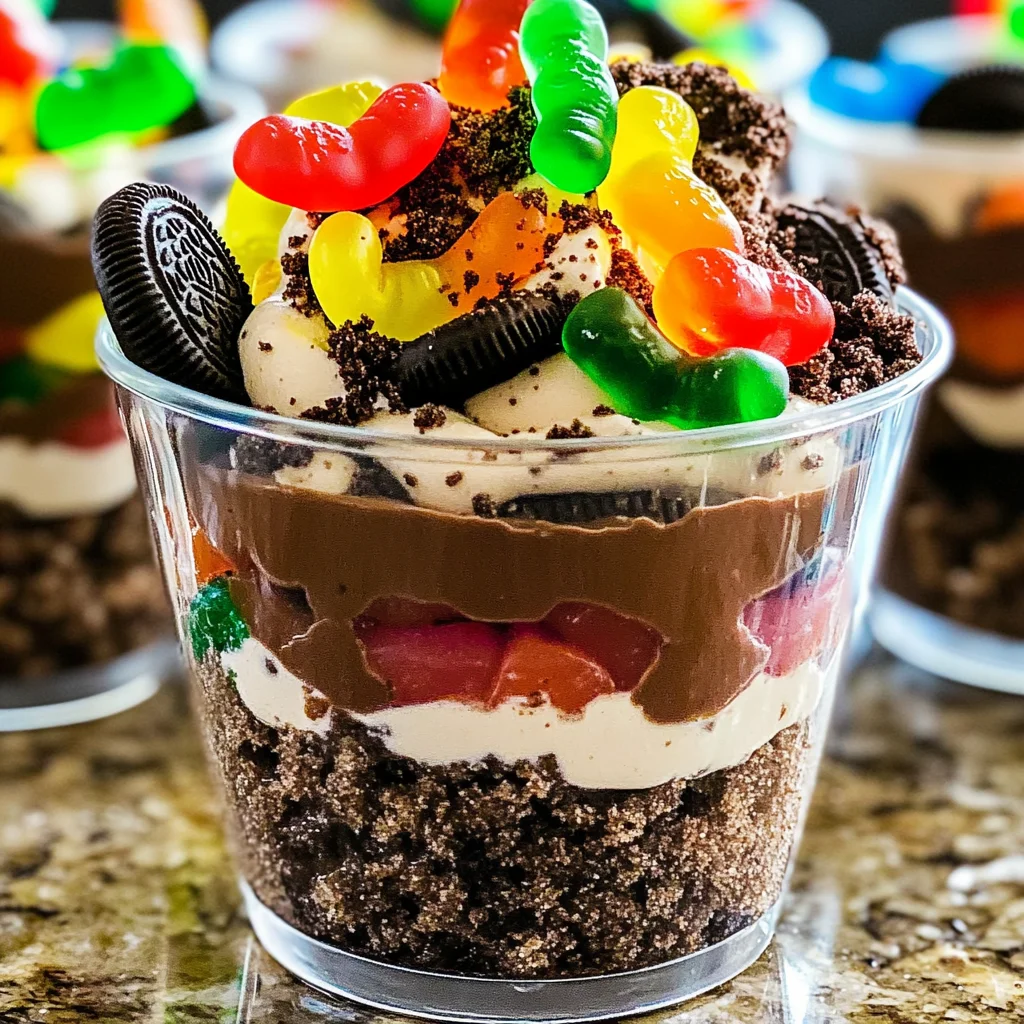
Dirt Cups are a fun and delightful dessert that everyone loves! These layers of chocolate pudding and crushed Oreos topped with colorful pectin-based gummy candies make them perfect for birthday parties, family gatherings, or any festive occasion. Not only do they look appealing, but they are also incredibly easy to prepare, making them a favorite among both kids and adults alike.

Jump to:
- Why You’ll Love This Recipe
- Tools and Preparation
- Essential Tools and Equipment
- Importance of Each Tool
- Ingredients
- For the Pudding Layer
- For the Topping
- How to Make Dirt Cups
- Step 1: Prepare the Pudding Mixture
- Step 2: Fold in Whipped Topping
- Step 3: Assemble the Cups
- Step 4: Chill and Serve
- How to Serve Dirt Cups
- Individual Servings
- Themed Parties
- Family Style
- Kid-Friendly Options
- How to Perfect Dirt Cups
- Best Side Dishes for Dirt Cups
- Common Mistakes to Avoid
- Storage & Reheating Instructions
- Refrigerator Storage
- Freezing Dirt Cups
- Reheating Dirt Cups
- Frequently Asked Questions
- How do I make Dirt Cups without dairy?
- Can I customize my Dirt Cups?
- How long do Dirt Cups last?
- What are some variations of Dirt Cups?
- Final Thoughts
- 📖 Recipe Card
Why You’ll Love This Recipe
- Easy to Make: With just a few simple ingredients, you can whip up this dessert in no time.
- Deliciously Indulgent: The combination of creamy chocolate pudding and crunchy Oreos creates a delightful texture and flavor.
- Customizable: You can easily adapt the recipe by adding different toppings or using various flavored gummy candies.
- Fun Presentation: The layered look makes these cups visually exciting, perfect for entertaining guests or serving at parties.
- Kid-Friendly: Kids will love helping to crush the Oreos and layer the ingredients, making it a great family activity.
Tools and Preparation
Before diving into the delicious world of Dirt Cups, gather your tools. Having everything ready will streamline your preparation process.
Essential Tools and Equipment
- Mixing bowl
- Whisk
- Glasses or cups for serving
- Spoon
Importance of Each Tool
- Mixing bowl: A large mixing bowl allows for easy combining of ingredients without spills.
- Whisk: A whisk helps achieve a smooth consistency for the pudding mix when combined with milk.
- Glasses or cups for serving: Using clear cups showcases the beautiful layers of this dessert, enhancing the visual appeal.
Ingredients
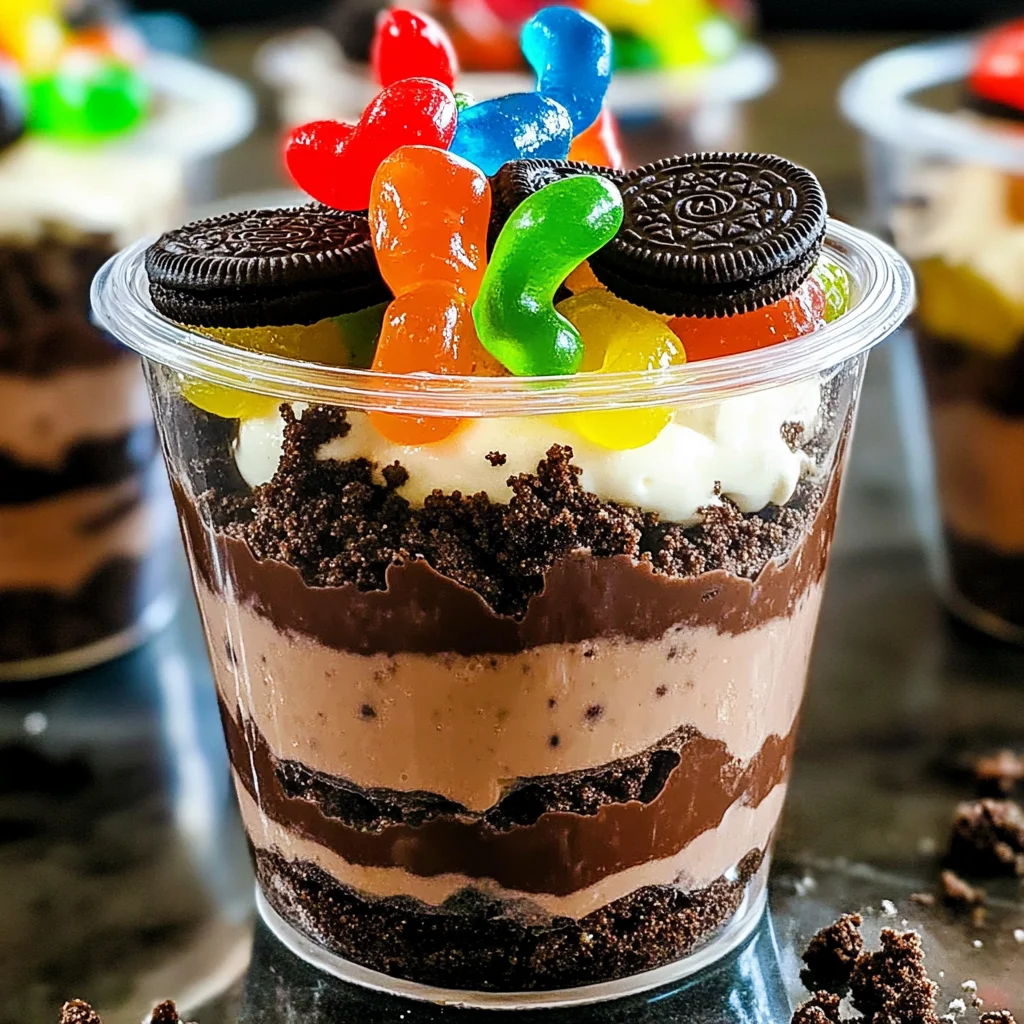
Layers of chocolate pudding, crushed Oreos topped with pectin-based gummy candies!
For the Pudding Layer
- 3.4 ounces box instant chocolate pudding mix
- 2 cups milk
- 8 ounces whipped topping (thawed)
For the Topping
- 10-12 Oreo cookies (crushed)
- 32 pectin-based gummy candies
How to Make Dirt Cups
Step 1: Prepare the Pudding Mixture
- In a medium bowl, add cold milk and sprinkle pudding over top. Whisk until well combined.
- Let sit for 5 minutes to thicken.
Step 2: Fold in Whipped Topping
- Gently fold in whipped topping until well combined.
Step 3: Assemble the Cups
- Spoon the pudding mixture into glasses or cups.
- Sprinkle crushed Oreo cookies on top of pudding in each cup.
- Add 4 pectin-based gummy candies on top of each cup.
Step 4: Chill and Serve
- Chill in the refrigerator until ready to serve.
With this easy recipe for Dirt Cups, you’ll create a delightful dessert that’s sure to impress!
How to Serve Dirt Cups
Dirt Cups are a fun and delightful dessert that can be served in various ways to suit different occasions. Whether it’s a birthday party or a casual family gathering, these layered cups will surely impress your guests.
Individual Servings
- Use clear cups or jars for a visually appealing presentation that showcases the layers of pudding and crushed Oreos.
Themed Parties
- For Halloween, consider adding gummy worms on top alongside the pectin-based candies to enhance the dirt theme.
Family Style
- Serve Dirt Cups in a large dish for a communal dessert experience, allowing everyone to scoop their own portions.
Kid-Friendly Options
- Allow kids to help with assembly; they can crush the Oreos and add their favorite gummy candies to their individual cups.
How to Perfect Dirt Cups
To ensure your Dirt Cups turn out perfectly every time, follow these simple tips for an even better dessert experience.
Use cold milk: Starting with cold milk helps the pudding mix dissolve better, resulting in a smoother texture.
Fold gently: When incorporating whipped topping into the pudding, fold gently to maintain its light and airy texture.
Chill before serving: Allowing the assembled cups to chill in the refrigerator for at least 30 minutes enhances flavor and makes them easier to serve.
Customize toppings: Get creative with toppings beyond Oreos—try adding sprinkles or different flavored gummy candies for variety.
Best Side Dishes for Dirt Cups
Pairing side dishes with your Dirt Cups can create a balanced meal. Here are some great options:
- Fresh Fruit Salad: A light and refreshing side that complements the richness of the Dirt Cups.
- Mini Sandwiches: Offer bite-sized sandwiches filled with turkey or chicken for a savory contrast.
- Veggie Platter: Crisp vegetables served with hummus make for a healthy and crunchy addition.
- Cheese Platter: A selection of cheeses can provide a savory balance to your sweet dessert.
- Chocolate Chip Cookies: These classic treats pair well with the chocolatey flavors of Dirt Cups.
- Pasta Salad: A cold pasta salad adds a satisfying element that balances out the sweet dessert.
Common Mistakes to Avoid
Avoiding common mistakes can elevate your Dirt Cups to the next level. Here are some pitfalls to watch for:
- Incorrect Pudding Consistency: Not allowing the pudding to sit for the recommended time can result in a runny texture. Always let it thicken for at least 5 minutes before adding other ingredients.
- Overmixing Whipped Topping: Mixing too vigorously can deflate the whipped topping, leading to a less airy dessert. Gently fold it into the pudding until just combined.
- Uneven Oreo Distribution: If you sprinkle all the crushed Oreos at once, they may clump together. Distribute them evenly across each cup for consistent flavor and texture.
- Skipping Chilling Time: Serving immediately can reduce the overall experience. Allow your Dirt Cups to chill in the refrigerator before serving for maximum flavor and texture.
- Using Non-Pectin Gummies: Using regular gummies instead of pectin-based candies will alter the texture of your Dirt Cups. Ensure you choose pectin-based options for the best results.
Storage & Reheating Instructions
Refrigerator Storage
- Store in airtight containers to maintain freshness.
- Consume within 3 days for optimal taste and quality.
Freezing Dirt Cups
- Place covered cups in the freezer if you need to store for longer.
- Use freezer-safe containers and consume within one month for best quality.
Reheating Dirt Cups
- Oven: Not recommended as this dessert is best served chilled.
- Microwave: Avoid microwaving; it can change the texture of your Dirt Cups.
- Stovetop: Not necessary; these cups are intended to be enjoyed cold.
Frequently Asked Questions
Here are some frequently asked questions about making Dirt Cups.
How do I make Dirt Cups without dairy?
You can use non-dairy milk alternatives such as almond or coconut milk and a non-dairy whipped topping.
Can I customize my Dirt Cups?
Absolutely! You can add different candies or even fruit on top for extra flavor and fun textures.
How long do Dirt Cups last?
They typically last up to 3 days in the refrigerator when stored properly.
What are some variations of Dirt Cups?
Consider using different flavors of pudding or themed gummy candies for special occasions, like Halloween or birthdays.
Final Thoughts
Dirt Cups are a delightful dessert that brings joy with every layer of chocolatey goodness and crunchy Oreos. They are versatile enough to be customized with various toppings or flavors according to your preferences. Don’t hesitate to try this fun recipe at your next gathering!
Did You Enjoy Making This Recipe? Please rate this recipe with ⭐⭐⭐⭐⭐ or leave a comment.
📖 Recipe Card
Print
Dirt Cups
- Total Time: 0 hours
- Yield: Serves 4
Description
Dirt Cups are a delightful and playful dessert that combines layers of creamy chocolate pudding, crushed Oreos, and colorful pectin-based gummy candies. This fun treat is perfect for birthday parties, family gatherings, or any celebration where you want to impress guests without spending hours in the kitchen.
Ingredients
- 3.4 ounces instant chocolate pudding mix
- 2 cups milk
- 8 ounces whipped topping (thawed)
- 10–12 Oreo cookies (crushed)
- 32 pectin-based gummy candies
Instructions
- In a medium bowl, combine cold milk and pudding mix. Whisk until smooth and let sit for 5 minutes to thicken.
- Gently fold in the thawed whipped topping until fully combined.
- Spoon the pudding mixture into clear glasses or cups. Top with crushed Oreos and pectin-based gummy candies.
- Chill in the refrigerator for at least 30 minutes before serving.
- Prep Time: 15 minutes
- Cook Time: N/A
- Category: Dessert
- Method: No-bake
- Cuisine: American
Nutrition
- Serving Size: 1 cup (220g)
- Calories: 310
- Sugar: 30g
- Sodium: 250mg
- Fat: 17g
- Saturated Fat: 8g
- Unsaturated Fat: 7g
- Trans Fat: 0g
- Carbohydrates: 36g
- Fiber: 2g
- Protein: 4g
- Cholesterol: 15mg
