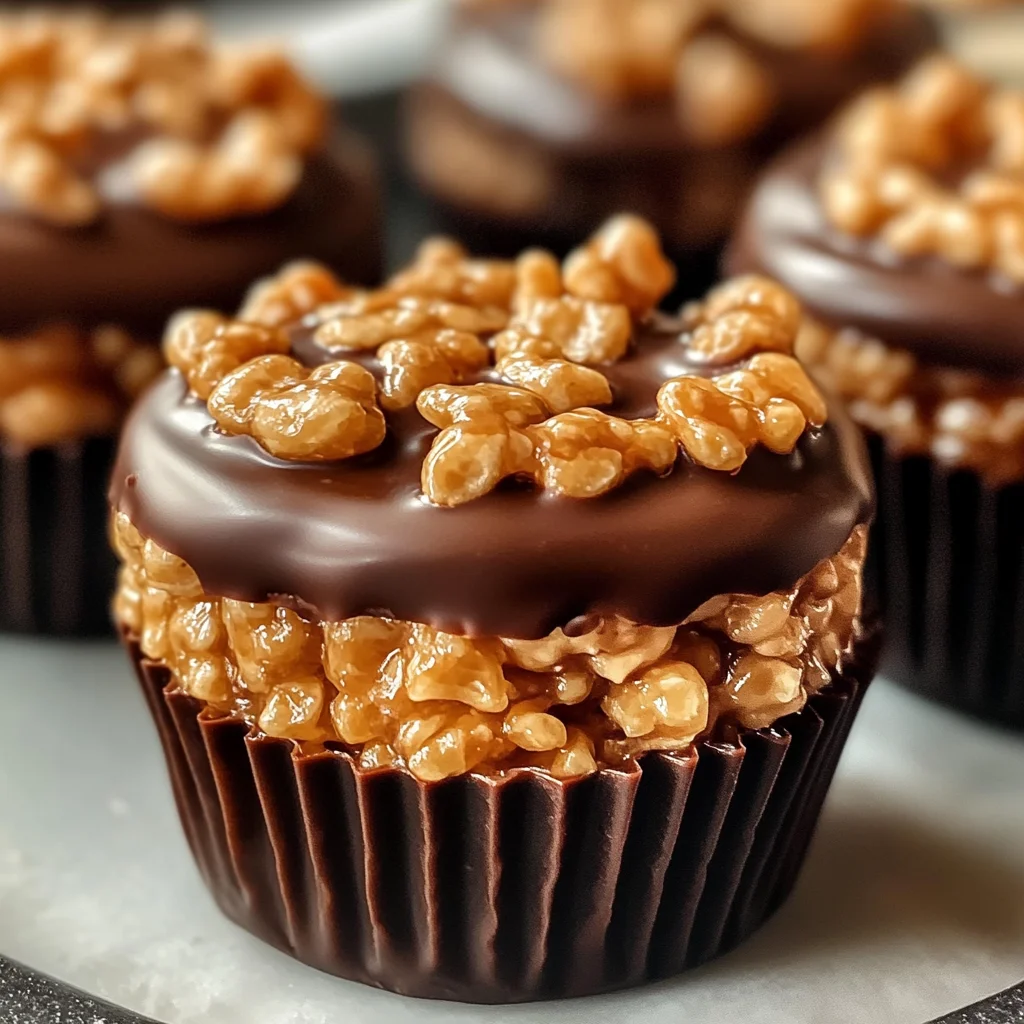
Quick, easy, and irresistibly delicious, these no-bake Chocolate Peanut Butter Rice Krispie Cups are the ultimate treat! The perfect balance of creamy peanut butter, rich chocolate, and crispy Rice Krispies creates a snack everyone will adore. Whether for parties, family gatherings, or a sweet pick-me-up, these cups are guaranteed to satisfy your cravings!

Jump to:
- Why You’ll Love This Recipe
- Tools and Preparation
- Essential Tools and Equipment
- Importance of Each Tool
- Ingredients
- For the Cups
- For the Topping
- How to Make Chocolate Peanut Butter Rice Krispie Cups
- Step 1: Melt the Base
- Step 2: Add Peanut Butter
- Step 3: Mix with Cereal
- Step 4: Shape the Cups
- Step 5: Add Chocolate Layer
- Step 6: Set & Serve
- How to Serve Chocolate Peanut Butter Rice Krispie Cups
- Individual Treats
- Dessert Platter
- With Ice Cream
- Party Favors
- Coffee Pairing
- Kid’s Snack Time
- How to Perfect Chocolate Peanut Butter Rice Krispie Cups
- Best Side Dishes for Chocolate Peanut Butter Rice Krispie Cups
- Common Mistakes to Avoid
- Storage & Reheating Instructions
- Refrigerator Storage
- Freezing Chocolate Peanut Butter Rice Krispie Cups
- Reheating Chocolate Peanut Butter Rice Krispie Cups
- Frequently Asked Questions
- Can I use crunchy peanut butter?
- How do I customize my Chocolate Peanut Butter Rice Krispie Cups?
- What if I don’t have mini marshmallows?
- How long do these treats last?
- Final Thoughts
- 📖 Recipe Card
Why You’ll Love This Recipe
- Effortless Preparation: With just a few simple steps, you can whip up these treats in no time.
- Decadent Flavor: The combination of chocolate and peanut butter is a classic flavor pairing that never fails to impress.
- Versatile Treat: Perfect for any occasion—be it a birthday party, holiday gathering, or just an afternoon snack.
- No-Bake Convenience: Enjoy a delicious dessert without the hassle of baking.
- Kid-Friendly Fun: Involve the little ones in making these cups for an engaging family activity.
Tools and Preparation
To make the Chocolate Peanut Butter Rice Krispie Cups, you’ll need some essential kitchen tools. Having the right equipment will make the process smoother and more enjoyable.
Essential Tools and Equipment
- Medium saucepan
- Large mixing bowl
- Muffin tin
- Paper liners
- Microwave-safe bowl
Importance of Each Tool
- Medium saucepan: Necessary for melting butter and marshmallows evenly.
- Large mixing bowl: Provides ample space to combine all ingredients without mess.
- Muffin tin: Helps shape the cups perfectly for serving.
- Paper liners: Make it easy to remove the cups without sticking.
Ingredients
For the Cups
- 3 cups Rice Krispies cereal
- 1 cup creamy peanut butter
- 1/2 cup unsalted butter
- 1 cup mini marshmallows
For the Topping
- 1 cup chocolate chips
- 1/2 tsp vanilla extract (optional)
- Pinch of sea salt (optional)
How to Make Chocolate Peanut Butter Rice Krispie Cups
Step 1: Melt the Base
In a medium saucepan over low heat, melt unsalted butter and mini marshmallows, stirring consistently until smooth.
Step 2: Add Peanut Butter
Stir in creamy peanut butter and vanilla extract (if using) until fully combined and creamy.
Step 3: Mix with Cereal
Pour the Rice Krispies cereal into a large bowl. Add the peanut butter mixture and gently fold until all the cereal is coated evenly.
Step 4: Shape the Cups
Line a muffin tin with paper liners. Spoon the mixture evenly into each cup and press down gently to form a flat surface.
Step 5: Add Chocolate Layer
Melt chocolate chips in a microwave-safe bowl using 20-second intervals, stirring in between. Spoon melted chocolate over each cup and spread evenly. Sprinkle with sea salt if desired.
Step 6: Set & Serve
Allow the cups to cool at room temperature for 20 minutes or place them in the refrigerator to set faster. Once firm, remove the paper liners and serve!
How to Serve Chocolate Peanut Butter Rice Krispie Cups
These delightful Chocolate Peanut Butter Rice Krispie Cups are perfect for any occasion. Whether you’re hosting a party or enjoying a quiet night in, here are some creative ways to serve them.
Individual Treats
- Serve each cup in its paper liner for a cute and tidy presentation. This makes them easy to grab and enjoy without any mess.
Dessert Platter
- Arrange the cups on a large platter, creating an eye-catching display. Add some fresh fruit around the cups for color and freshness.
With Ice Cream
- Top each Rice Krispie cup with a scoop of vanilla or chocolate ice cream. The combination of warm chocolate and cold ice cream is heavenly!
Party Favors
- Package individual cups in clear bags tied with ribbons. These make lovely homemade party favors that guests will appreciate.
Coffee Pairing
- Serve these treats alongside coffee or tea. The rich flavors complement the warmth of your favorite hot drinks perfectly.
Kid’s Snack Time
- Include these cups in lunchboxes or after-school snacks. Kids will love the fun shape and delicious taste!
How to Perfect Chocolate Peanut Butter Rice Krispie Cups
To make sure your Chocolate Peanut Butter Rice Krispie Cups turn out flawlessly every time, follow these helpful tips.
- Use Fresh Ingredients: Ensure your peanut butter and chocolate chips are fresh for the best flavor and texture.
- Measure Carefully: Accurate measurements will help maintain the right consistency so that the cups hold their shape.
- Melt Slowly: When melting butter and marshmallows, do it over low heat to prevent burning and ensure a smooth mixture.
- Chill Before Serving: For firmer cups, allow them to set in the refrigerator for at least 30 minutes after assembling.
- Add Toppings: Experiment with toppings like crushed nuts or sprinkles to customize your treats for special occasions.
- Store Properly: Keep leftover cups in an airtight container at room temperature for up to one week for optimal freshness.
Best Side Dishes for Chocolate Peanut Butter Rice Krispie Cups
Pairing side dishes with your Chocolate Peanut Butter Rice Krispie Cups can elevate your dessert experience. Here are some great options:
- Fruit Salad – A refreshing mix of seasonal fruits adds a light contrast to the rich flavors of the cups.
- Yogurt Parfaits – Layered yogurt with granola complements the sweetness while adding a creamy texture.
- Cheese Platter – A selection of cheeses balances sweetness with savory flavors, making it an elegant pairing.
- Veggie Sticks – Crisp vegetables like carrots and celery provide a crunchy contrast that enhances snack time.
- Chocolate Fondue – Dip fresh fruit or pretzels into melted chocolate for a fun interactive dessert experience.
- Ice Cream Sundaes – Offer an ice cream bar where guests can top their scoops with various toppings, including crushed Rice Krispie cups!
Common Mistakes to Avoid
Making Chocolate Peanut Butter Rice Krispie Cups can be easy, but there are some common pitfalls to watch out for. Here are a few mistakes to avoid:
- Skipping the Butter: Not using enough butter can lead to a dry mixture. Make sure to measure accurately for the perfect texture.
- Overheating Ingredients: Overheating the marshmallows and butter can cause them to burn. Always melt on low heat and stir consistently.
- Not Folding Gently: Mixing too vigorously when combining the cereal can crush it. Gently fold to keep the crunch intact.
- Ignoring Cooling Time: Cutting into the cups too soon can make them messy. Allow them to cool completely before serving.
- Using Non-Sticky Cookware: Not lining the muffin tin properly may result in stuck cups. Use paper liners or grease the tin well.
Storage & Reheating Instructions
Refrigerator Storage
- Store in an airtight container for up to 1 week in the refrigerator.
- Separate layers with parchment paper if stacking.
Freezing Chocolate Peanut Butter Rice Krispie Cups
- Freeze for up to 3 months in an airtight container.
- Wrap each cup individually in plastic wrap for best results.
Reheating Chocolate Peanut Butter Rice Krispie Cups
- Oven: Preheat to 350°F (175°C) and warm for about 5-10 minutes.
- Microwave: Heat in 10-second intervals until just warm but not melted.
- Stovetop: Use a non-stick pan over low heat, warming gently while covered.
Frequently Asked Questions
Here are some frequently asked questions about making Chocolate Peanut Butter Rice Krispie Cups.
Can I use crunchy peanut butter?
Yes, you can substitute crunchy peanut butter for creamy if you want added texture.
How do I customize my Chocolate Peanut Butter Rice Krispie Cups?
Feel free to add ingredients like nuts, dried fruit, or even different types of chocolate for variety!
What if I don’t have mini marshmallows?
You can use regular marshmallows; just cut them into smaller pieces before melting.
How long do these treats last?
When stored properly, they can last up to one week in the refrigerator or three months in the freezer.
Final Thoughts
These Chocolate Peanut Butter Rice Krispie Cups are a delightful treat that combines sweet chocolate and creamy peanut butter with crispy cereal. Their no-bake nature makes them incredibly easy to prepare, which is perfect for parties or a quick snack at home. Feel free to customize them with your favorite mix-ins for even more deliciousness!
Did You Enjoy Making This Recipe? Please rate this recipe with ⭐⭐⭐⭐⭐ or leave a comment.
📖 Recipe Card
Print
Chocolate Peanut Butter Rice Krispie Cups
- Total Time: 25 minutes
- Yield: Approximately 12 servings 1x
Description
Indulge in the ultimate no-bake treat with these delightful Chocolate Peanut Butter Rice Krispie Cups. Combining the rich flavors of creamy peanut butter and luscious chocolate, these crispy cups are quick and easy to make, perfect for satisfying your sweet cravings. Whether you’re hosting a party, enjoying a family gathering, or simply treating yourself, these cups will be a hit! With minimal preparation and no baking required, they’re an ideal dessert for busy days. Get ready to impress friends and family alike with this irresistible snack that’s both fun to make and delicious to eat!
Ingredients
- 3 cups Rice Krispies cereal
- 1 cup creamy peanut butter
- 1/2 cup unsalted butter
- 1 cup mini marshmallows
- 1 cup chocolate chips
Instructions
- In a medium saucepan over low heat, melt the unsalted butter and mini marshmallows until smooth.
- Stir in the creamy peanut butter (and vanilla extract if using) until fully combined.
- Pour the Rice Krispies into a large mixing bowl. Add the melted mixture and gently fold until all the cereal is coated.
- Line a muffin tin with paper liners. Spoon the mixture into each cup and press down to flatten.
- Melt the chocolate chips in a microwave-safe bowl in 20-second intervals, stirring in between. Spoon over each cup and spread evenly.
- Allow the cups to cool at room temperature or refrigerate for faster setting. Once set, enjoy!
- Prep Time: 15 minutes
- Cook Time: 10 minutes
- Category: Dessert
- Method: No-Bake
- Cuisine: American
Nutrition
- Serving Size: 1 cup (45g)
- Calories: 210
- Sugar: 13g
- Sodium: 65mg
- Fat: 11g
- Saturated Fat: 4g
- Unsaturated Fat: 6g
- Trans Fat: 0g
- Carbohydrates: 25g
- Fiber: 1g
- Protein: 4g
- Cholesterol: 10mg